

Geographic Information Systems (GIS) aren’t just analytical tools. They are also powerful data presentation tools. And it doesn’t just stop at maps and layers, you can work with 3D data, terrain, light and shadows to build truly striking art pieces.
Today we’re going to walk through making this striking image of Mount Fuki in Japan using ArcGIS Pro and data from the Living Atlas.
Getting everything ready
We’ll start by opening up a new ArcGIS Pro project and a new Map. We will use the locate tool in the Map tab, to find Mount Fuji.

Locating Mount Fuji using the Locate tool in ArcGIS Pro.
Selecting the location will zoom to the site.
I’m not sure about you, but I have ArcGIS Pro setup to open the Topographic basemap by default. But for this project, we’ll need imagery, so change the basemap to Imagery. The peak of Mount Fuji stands out from the green landscape.

For reasons that will become obvious later, we need to draw a massive box over Mount Fuji. To do that, we’ll insert a polygon Map Note.

Insert Polygon Map Note.
Using the polygon map note, I’m drawing a massive square over the map frame that encompasses most of the frame at 1:500,000 scale.

Next we will go to the Edit tab, and select the Move tool, ensuring that the Yellow centre dot that appears when the tool is activated is located exactly on top of Mount Fuji. You can see here, that it started offset.

Move polygon so the centre is directly over Mount Fuji.
You might need to zoom in to make it precise. Save edits.
Now we go 3D
Once that is done, go to the View tab, and select Convert > Local Scene. By default, your Map Note layer is probably in the 3D layers (which actually has a cool effect of highlighting the lower elevations). We’ll need to drag it down into the 2D layers section. Once you’ve done that, the Map Note should appear as a standard box over the area.

Turn the Map Note layer off for not in the Contents pane.
Zoom in to Mount Fuji and pan upwards so you’re looking at it from the south (one of the best angles in my opinion).

Local scene of Mount Fuji in ArcGIS Pro.
We’ll make it start a little taller. In the Contents pane, highlight “Ground” in the Elevation Surfaces section, then go to the “Elevation Surface Layer” tab. Once there, change the Vertical Exaggeration to 1.50.

Adding vertical exaggeration.
Shining the spotlight
Now we want to highlight Mount Fuji and have the surrounding area blacked out. To do that, turn on your Polygon Note layer and go into the Symbology.
You’ll need to make the following adjustments:
Turn off the stroke
Change the solid fill to gradient fill
Change the Pattern from Buffered to Circular
Change the Type from Discreet to Continuous
And adjust the gradient as follows:
Change the gradient from black to full transparent black
Pull the black slider up from 0% to 92%
Pull the transparent black slider down from 100% to 95%
The gradient settings are the ones that worked for my polygon. You may need to adjust the values based on the size of the polygon you drew so that the gradient hugs the base of the mountain.

Adjusting the gradient.

This should be the result
Mount Fuji in the spotlight.
Hint: If you like your viewing angle, consider saving as a bookmark so you don’t lose it if the map frame shifts.
And in come the shadows
This is starting to look good. But we can make this more dramatic.
There are plenty of light and shade options in ArcGIS Pro that we can use, but we’re going to do the shading using layers.
Go to the Map tab, select Add Data, and go to the Living Atlas tab. Once there, search for “Terrain”. Add the layer called Terrain that is managed by Esri.
Suddenly everything turns grey.

Next go to the Analysis tab, and select Raster Functions, to open the Raster Functions pane. Go to Surface and select Hillshade.
In our example, we are looking from the south towards the mountain. We want the left side to by illuminated, and the right side shaded. We want to simulate the sun being low in the sky to emphasise the shading on the eastern side. These are the settings we will use to make that work:
Raster: Terrain
Hillshade Type: Traditional
Azimuth: 280
Altitude: 15
Scaling: None
Z Factor: 1
Click Create new layer.

The hillshade raster function in ArcGIS Pro.
Now we’re talking.

Hillshade of Mount Fuji.
With the Hillshade_Terrain layer turned on, go to the Raster layer tab and change Layer Blend to Overlay. This will make the grey tones of the hillshade transparent while leaving light parts light and dark parts dark thus, exposing the imagery underneath.
If your image is a bit dark, while in the Raster Layer tab, increase the exposure. A value of 10 worked well for me.

Next, duplicate the Polygon Note layer and make it an inverse of the black one. That is, where it is fully black, make it fully white. Where it is transparent black, make it transparent white. Adjust the ranges so the breaks are at 100%, 99% and 98%.

Apply Overlay Layer Blend. Go into the Symbology, and add a Move effect, and configure it so that it is offset -100 pt on the X axis. This means it is illuminating the western slope.
One final adjustment before we make this into a layout.
Select Map_3D in the Contents, then go to the View tab. Select Camera to turn on the Camera effects. It will make the mountain blurry so we need to go deeper into the Camera Effect Settings. Open them and then set the Focus Distance by selecting the crosshairs and clicking on the mountain. This focuses on the mountain. But you’ll notice it is still blurry. That’s because the part you selected is in focus, but the Focus Depth is so narrow that only that exact spot is in focus. We need to expand the Focus Depth so that most of the mountain is in focus, but some of the nearer parts are slightly out of focus (thus giving the depth of field effect). For me, that value was 4000 m.

Adjusting Camera Settings in ArcGIS Pro local scene.
Let’s make a map
Finally we will make this into a layout. Go to Insert, New Layout > A4 Landscape.
Go to Insert, Map Frame and draw the map frame into the layout ensuring it encompasses all of the white space.

Activate the map frame and reposition your mountain to get the most dramatic effect.
Don’t worry if you can see land near the horizon. We’ll cover that up with a black rectangle. Go to Insert, draw a rectangle over it and colour it black. You should have something like this:

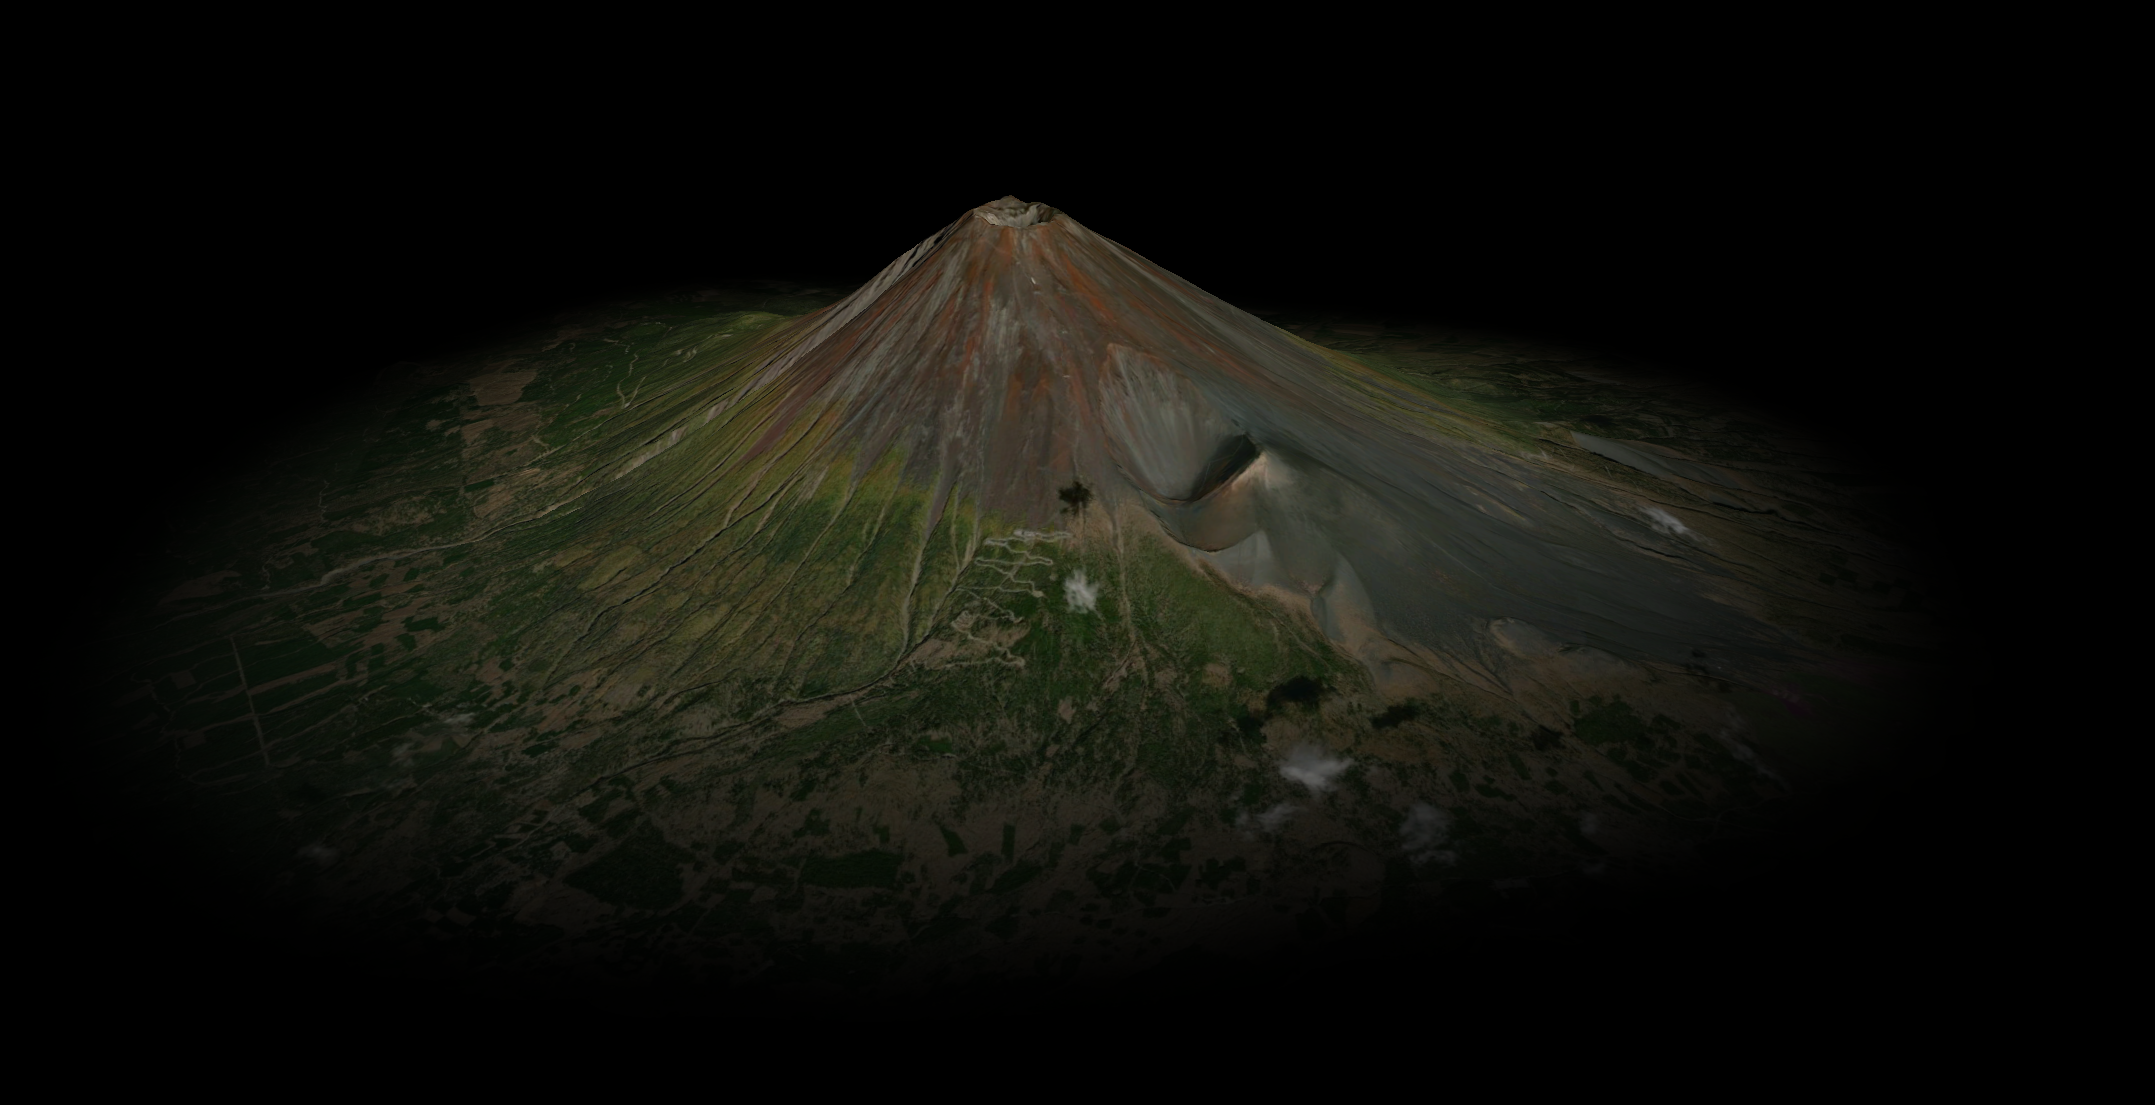
We won’t go over styling the layout here, but go wild. We’ve kept it relatively subdued here.

Final layout of Mount Fuji after a final exposure edit in Photoshop.